
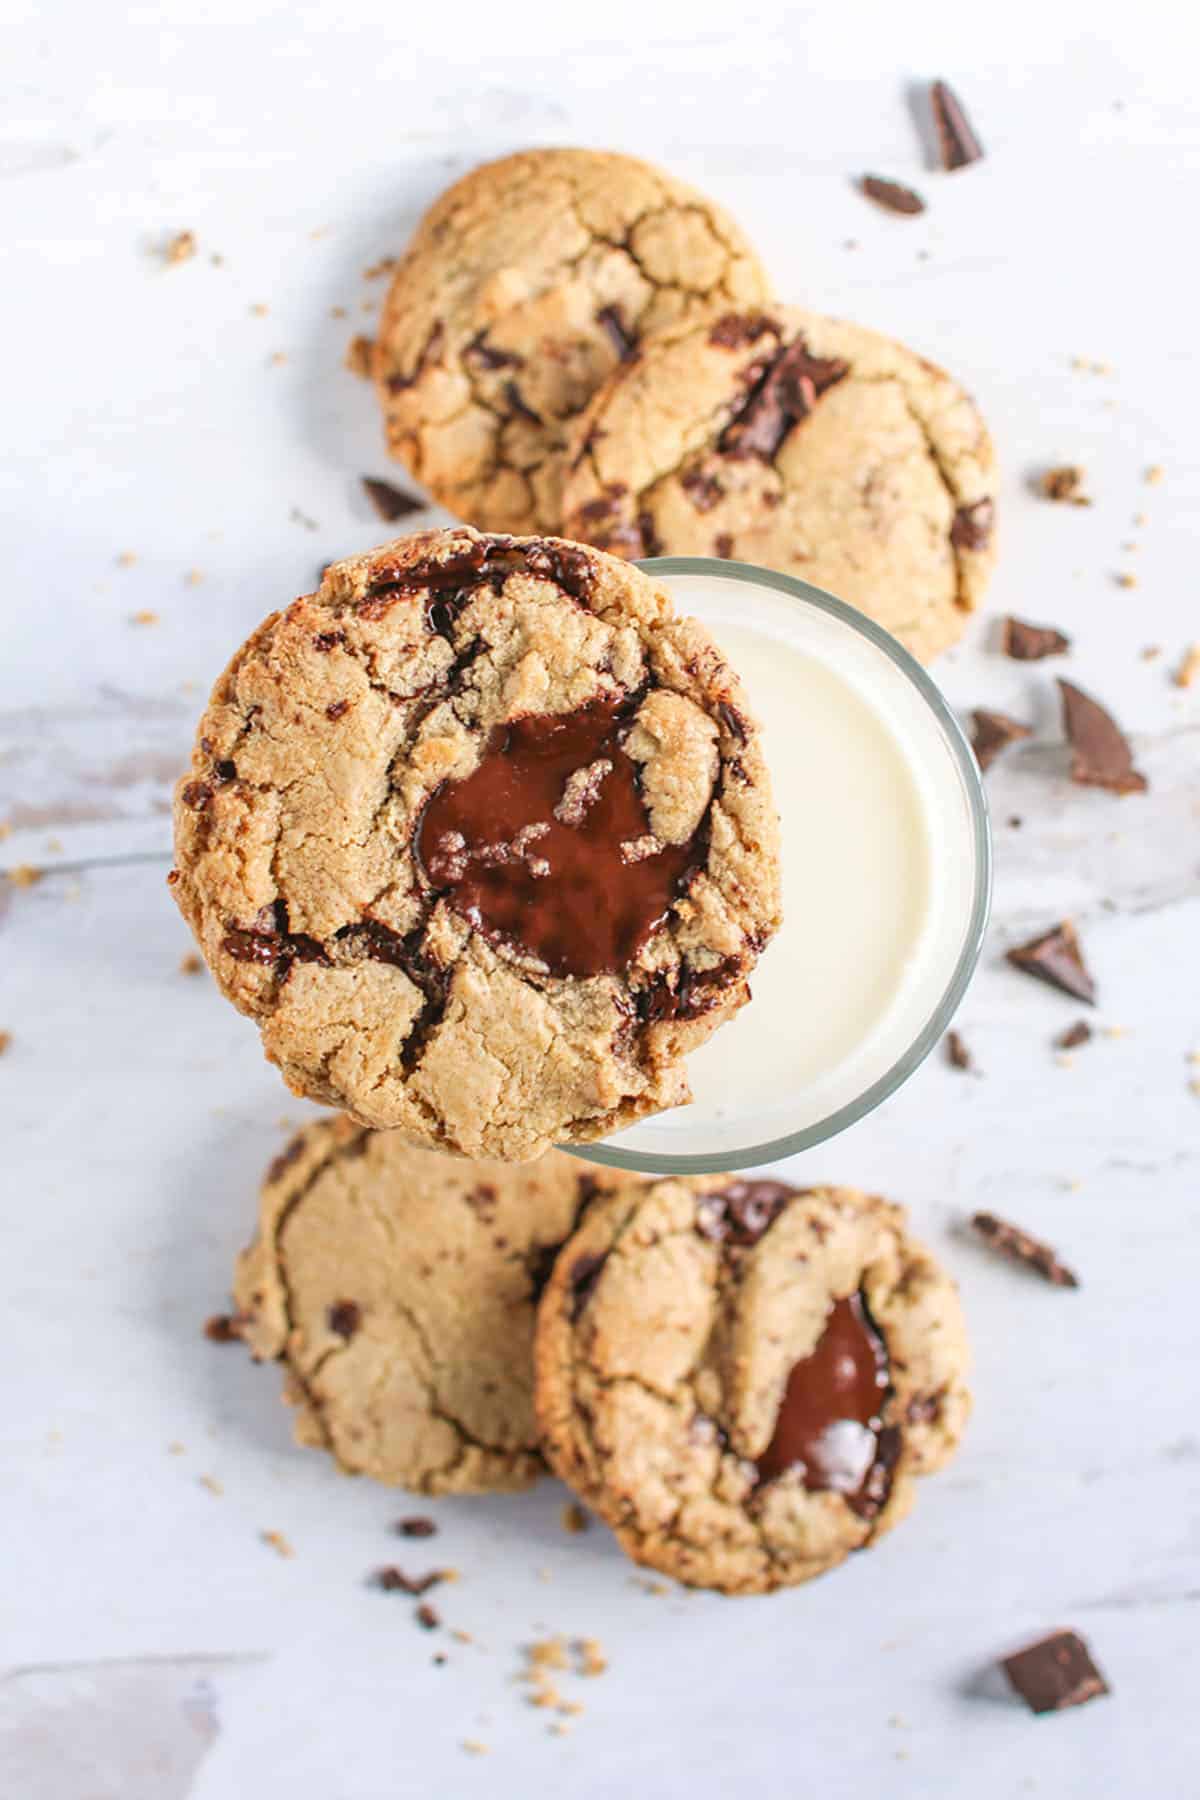
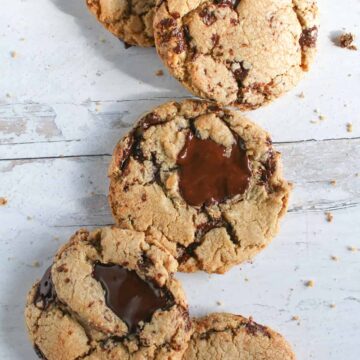
Chewy, chocolately, and super flavorful! These High Altitude Brown Butter Chocolate Chip Cookies are loaded with flavor and will surely become your new favorite cookie recipe! No stand mixer required.

My favorite types of cookies are chocolate chip and while I've perfected High Altitude Chocolate Chip Cookies which are chewy and soft. But, these High Altitude Brown Butter Chocolate Chip Cookies are absolute perfection with rich nutty brown butter flavor and of course loaded with lots of chocolate chunks. Just a bit of waiting time results in a super flavorful cookie.
Why You'll Love This Recipe
- Super flavorful from the brown butter
- Loaded with tons of chocolate chunks!
- No stand mixer required
Ingredients
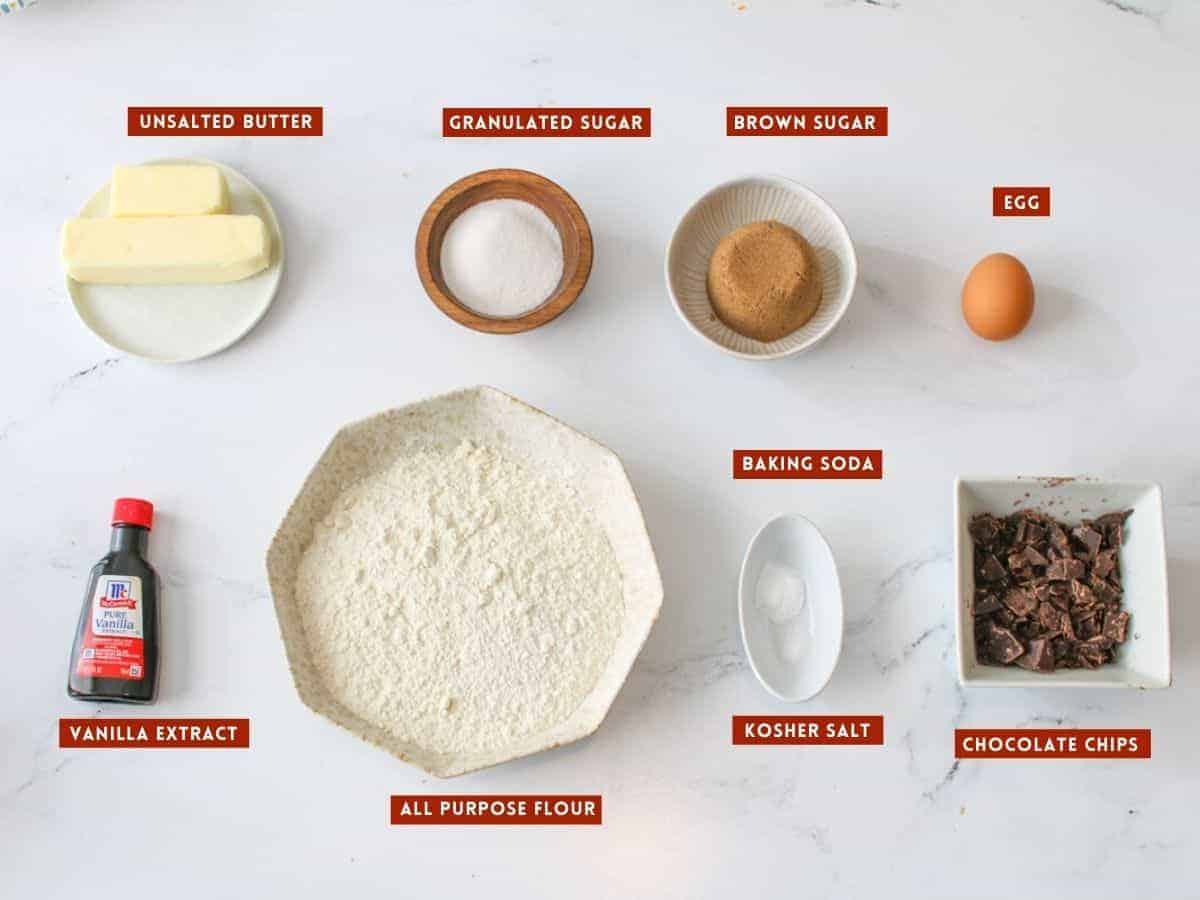
See recipe card for quantities.
Ingredient Notes
- Unsalted Butter: I use unsalted so we can control the amount of salt. The butter adds richness and results in a delicious buttery cookie.
- Water: Through the browning of the butter, all of the water is released which is necessary for dissolving sugar. We add a bit of water back to replace the water lost.
- Sugar: I use dark brown and granulated sugar to give us just the right amount of sweetness and chewiness. I like dark brown sugar for its robust taste and the acid from the molasses reacts with the baking soda.
- Egg: A whole egg to bind the cookie dough, add moisture, and add richness.
- Flour: I always use all-purpose flour. Just make sure to measure the flour correctly.
- Salt: I prefer to use kosher or fine sea salt in my recipes.
- Vanilla Extract: I recommend using a nice vanilla extract. You can also use vanilla bean paste or vanilla bean powder.
- Baking Soda: it's our only leavening agent in these cookies. It reacts with the acidic molasses in the dark brown sugar, which results in a higher rise than using a light brown sugar.
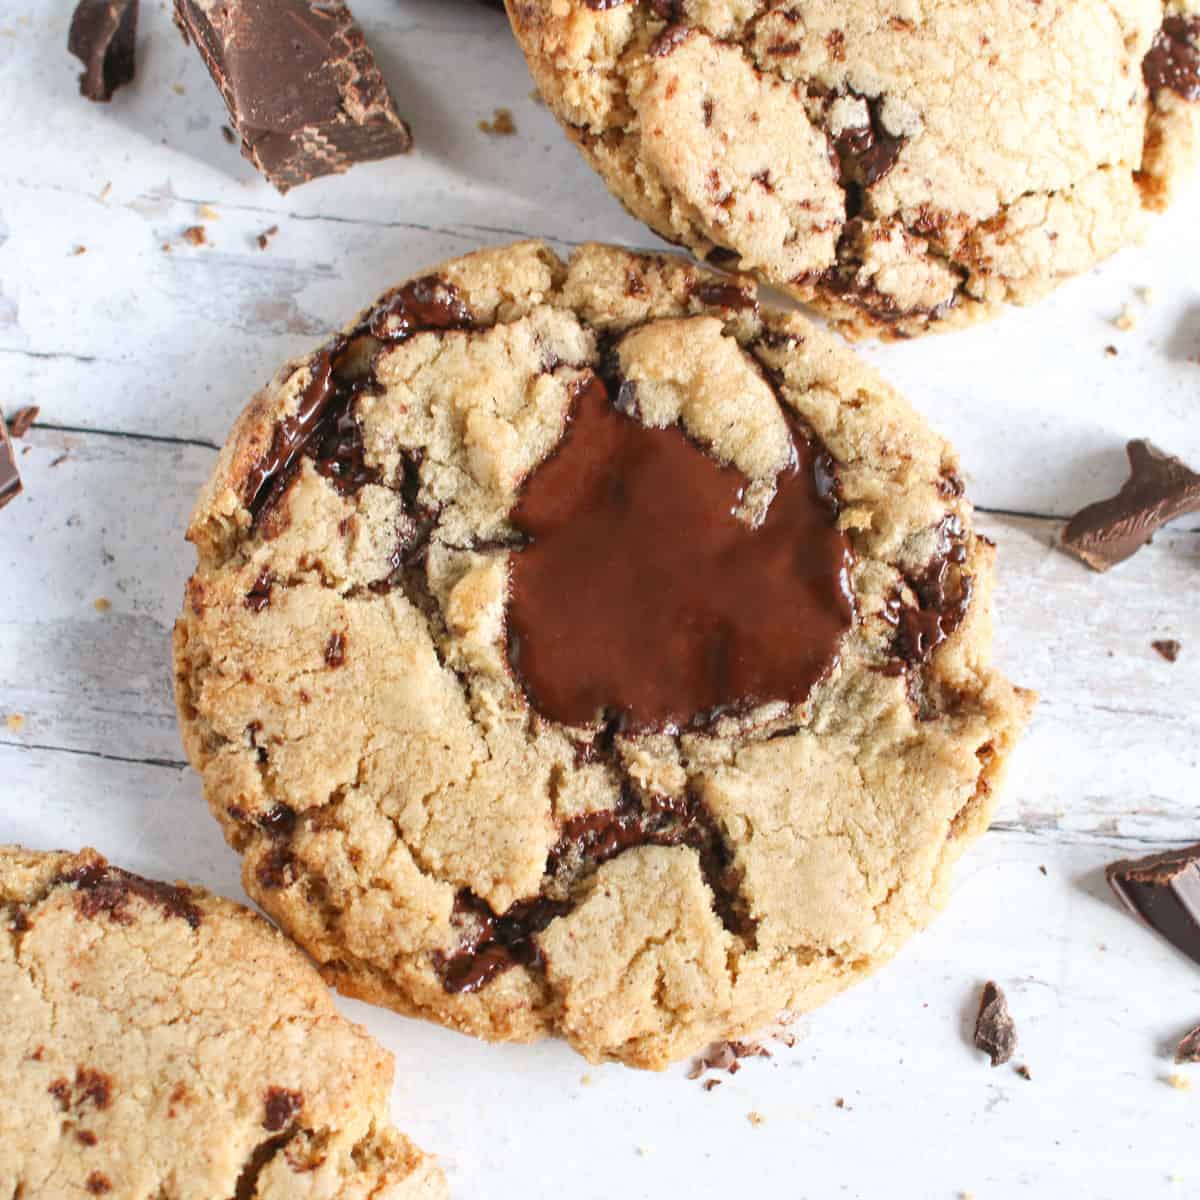
- Semisweet chocolate chunks: I like to chop my own chocolate chunks from a chocolate bar to make the cookies feel truly homemade but you can use whatever chocolate chip/chunk you have on hand as well.
Step-by-Step Instructions

- Place pieces of butter in a light-colored pan over medium heat. Stir the butter the entire time to keep it moving using a silicone spatula. Once melted, the butter will begin to foam and sizzle around the edges. Keep stirring. In about 5-8 minutes from when you started, the butter will turn golden brown. Some foam will subside and the milk solids at the bottom of the pan will become a toasty brown. It will smell intensely buttery and nutty. Immediately remove the pan from heat and pour the butter into heat-proof bowl to stop the cooking process and let it cool slightly until its just warm to the touch.
- To a large mixing bowl, add slightly cooled brown butter, water, and both sugars. Mix by hand or with a hand mixer until combined.
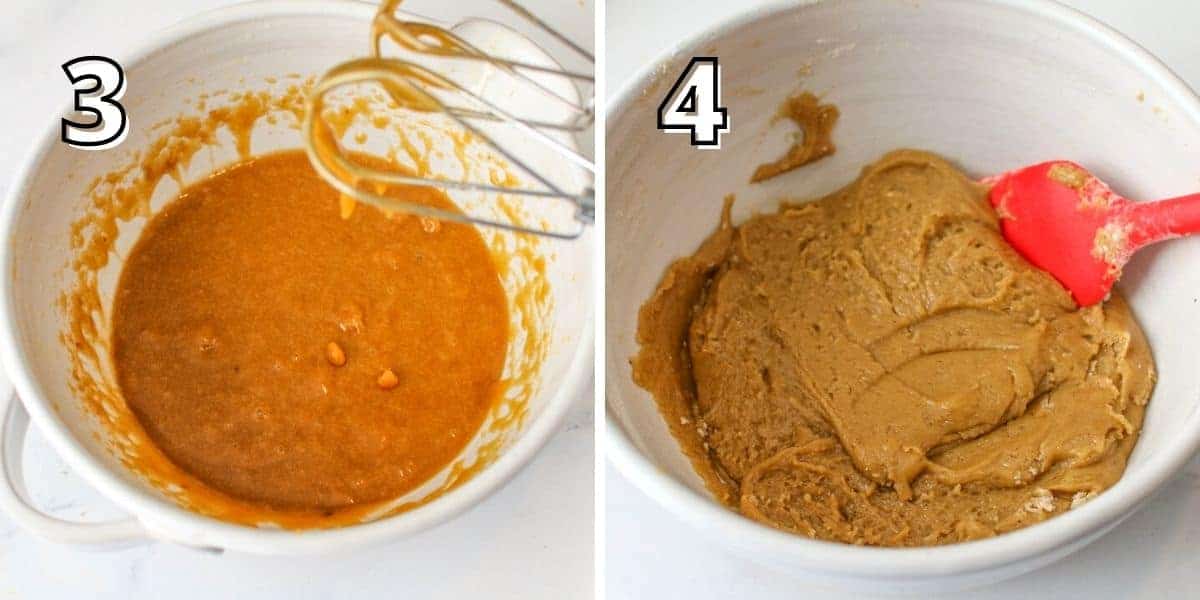
- Next, add in the egg and vanilla extract, beat until for about 3-5 minutes until fluffy. You should see the dough become a slightly lighter brown color.
- Add in kosher salt, baking soda, and all-purpose flour. Fold into the dough with a wooden spoon or silicone spatula until just combined. It's okay if there are a few streaks of flour.
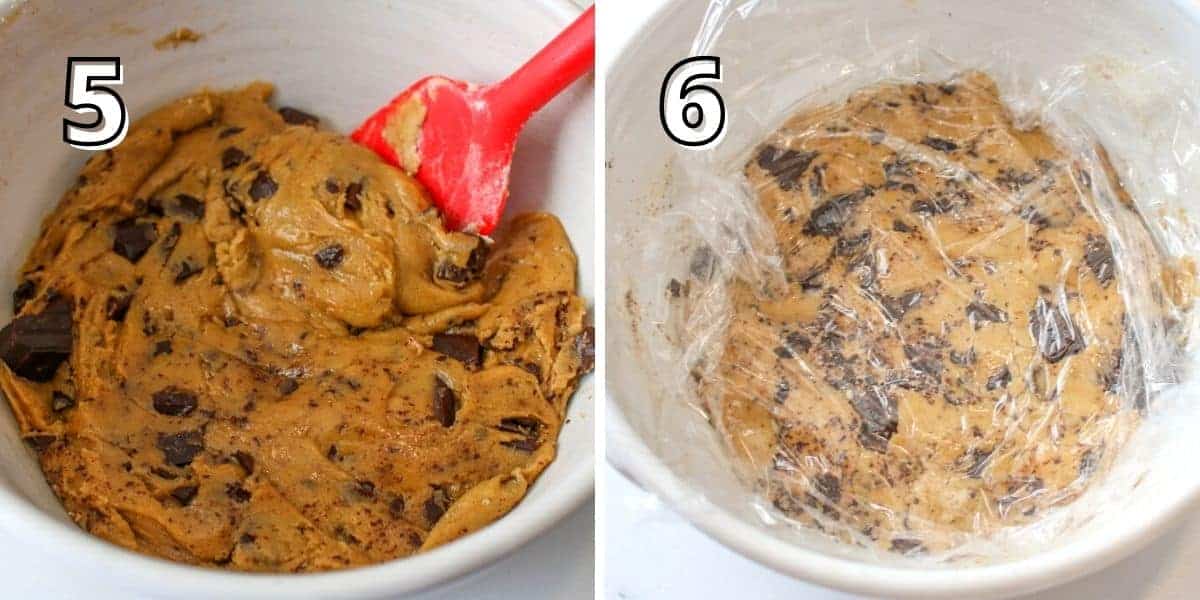
- Add in chocolate chunks and use a silicone spatula to mix the dough until chocolate is evenly distributed into the batter.
- Cover with plastic wrap and store in the fridge for at least 1 hour, or overnight - 24 hours. Note: I recommend if you are going to refrigerate these overnight to scoop the dough after an hour, place on a tray lined with parchment paper, wrap and then restore in the fridge. The dough does firm up and this will save you some time and sore arms later. I used a scoop that holds about 3 tablespoons.
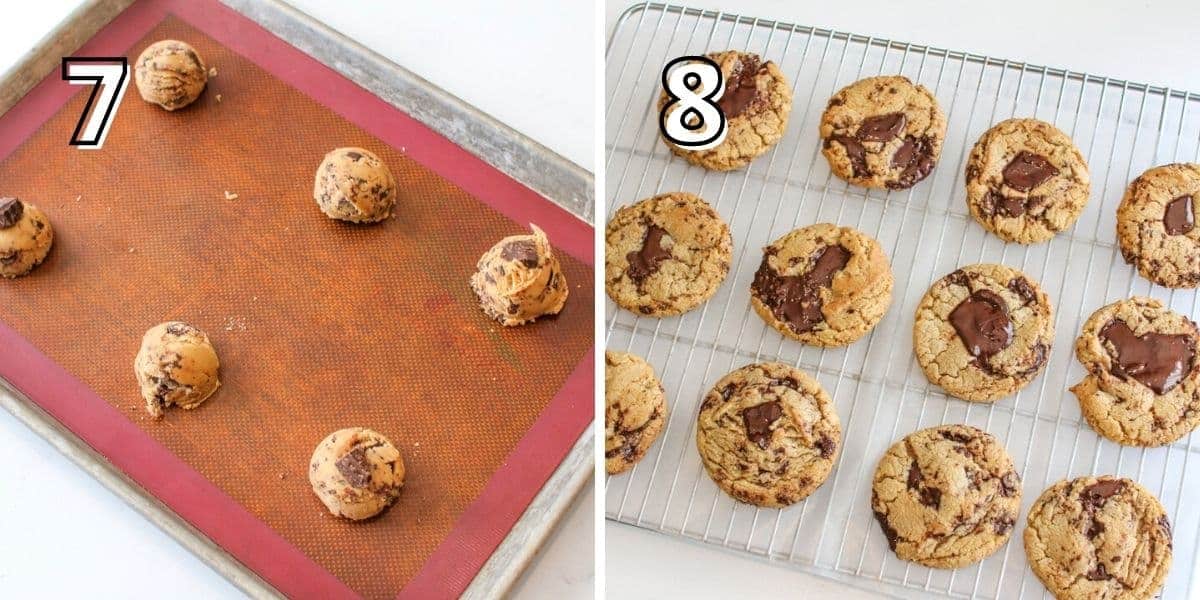
- Pre-heat an oven to 350 degrees Fahrenheit. Scoop cookie dough (if you haven't already, a cookie scoop that holds about 3 tablespoons) place on a baking sheet roughly 2-3 inches spread out. (Optional: top each dough ball with a chocolate chunk) Once oven is pre-heated bake for 11-13 minutes. Let the cookies cool on the baking pan for 10 minutes.
- Enjoy now for lots of gooey chocolate or carefully move cookies to a cooling rack to cool to room temperature.
Expert Tips
- Properly Measure Flour: If you just dip your measuring cup into a bag of flour, chances are you have way too much flour due to packing. I keep a small digital scale to accurately measure flour BUT you can also use the spoon and level method too if you don't have a scale. To do this, use a spoon to fluff up the flour within your flour bag or container. Then use a spoon to scoop the flour into the measuring cup and finally use the straight edge of a knife to level the flour across the measuring cup.
- Dark brown sugar > light brown sugar: I like dark brown sugar because of the robust flavor and how chewy it makes the cookies but its also key to activating the baking soda.
- Chill the dough! You need to chill this dough for AT LEAST 1 HOUR. That allows the brown butter to solidify in the dough. Which means less spread of the cookies. Also, it's hydrating the dough resulting in more flavor. My recommendation, if you do chill the dough for longer than an hour or two is to scoop after an hour then line on parchment paper, wrap in plastic wrap and store back into the fridge. Since the brown butter becomes a solid, it can be a bit tough to scoop it out after its been in the fridge overnight.
- Got chocolate? There's not such thing as too much chocolate! If you have leftover chunks or chips. I like to add another chunk onto my cookie dough right before baking. It makes the cookies look even more delicious with that ooey gooey chocolate.
Recipe FAQ
When browning butter, water is released as the milk solids caramelize. Water is key to dissolving sugar and without that water the sugar never fully dissolves which leads to a grainy cookie. That's why we add just a bit of water back into the recipe so our cookies are soft and chewy.
Browning butter is the process of melting butter so that the water evaporates leaving just the milk solids to cook and it takes on a nutty, toasty, caramel-like flavor. The brown butter is what makes this recipe so unique and provides a depth of flavor. Watch this video for more details on how to properly brown butter.
I baked these cookies at 5,280 ft! Check out this high altitude resource to adjust these cookies for your altitude.
For my oven, I found baking these cookies at 11 minutes resulted in a doughy center cooking. 12 minute was still a little doughy but still cooked. 13 minutes the cookies were fully cooked. 14 minutes and my cookies were a bit crispy.
Storage
Store fully cooled cookies in an airtight container at room temperature for 2-3 days.
You Might Also Like


PS If you try this recipe, why not leave a star rating in the recipe card right below and/or a review in the comments section further down the page? I always appreciate feedback. You can also follow me on Pinterest, Facebook or Instagram.
High Altitude Brown Butter Chocolate Chip Cookies
Ingredients
- 9 tablespoons butter, unsalted
- 1 & ½ tablespoons water
- ¼ cup granulated sugar
- ½ cup dark brown sugar, packed
- 1 egg, large room temperature
- 1 teaspoon vanilla extract
- 1 & ¾ cups all-purpose flour
- ½ teaspoon baking soda
- pinch of salt
- 1 cup semisweet chocolate chunks ( I recommend saving around 14 chunks of chocolate to top the cookies right before baking)
Instructions
- Place pieces of butter in a light-colored pan over medium heat. Stir the butter the entire time to keep it moving using a silicone spatula. Once melted, the butter will begin to foam and sizzle around the edges. Keep stirring. In about 5-8 minutes from when you started, the butter will turn golden brown. Some foam will subside and the milk solids at the bottom of the pan will become a toasty brown. It will smell intensely buttery and nutty. Immediately remove the pan from heat and pour the butter into heat-proof bowl to stop the cooking process and let it cool slightly until its just warm to the touch.
- To a large mixing bowl, add slightly cooled brown butter, water, and both sugars. Mix by hand or with a hand mixer until combined.
- Next, add in the egg and vanilla extract, beat until for about 3-5 minutes until fluffy. You should see the dough become a slightly lighter brown color.
- Add in kosher salt, baking soda, and all-purpose flour. Fold into the dough with a wooden spoon or silicone spatula until just combined. It's okay if there are a few streaks of flour.
- Add in chocolate chunks and use a silicone spatula to mix the dough until chocolate is evenly distributed into the batter.
- Cover with plastic wrap and store in the fridge for at least 1 hour, or overnight - 24 hours. Note: I recommend if you are going to refrigerate these overnight to scoop the dough after an hour, place on a tray lined with parchment paper, wrap and then restore in the fridge. The dough does firm up and this will save you some time and sore arms later. I used a scoop that holds about 3 tablespoons.
- Pre-heat an oven to 350 degrees Fahrenheit. Scoop cookie dough (if you haven't already, a cookie scoop that holds about 3 tablespoons) place on a baking sheet roughly 2-3 inches spread out. (Optional: top each dough ball with a chocolate chunk) Once oven is pre-heated bake for 11-13 minutes. Let the cookies cool on the baking pan for 10 minutes.
- Enjoy now for lots of gooey chocolate or carefully move cookies to a cooling rack to cool to room temperature.
Notes
- Properly Measure Flour: If you just dip your measuring cup into a bag of flour, chances are you have way too much flour due to packing. I keep a small digital scale to accurately measure flour BUT you can also use the spoon and level method too if you don't have a scale. To do this, use a spoon to fluff up the flour within your flour bag or container. Then use a spoon to scoop the flour into the measuring cup and finally use the straight edge of a knife to level the flour across the measuring cup.
- Dark brown sugar > light brown sugar: I like dark brown sugar because of the robust flavor and how chewy it makes the cookies but its also key to activating the baking soda.
- Chill the dough! You need to chill this dough for AT LEAST 1 HOUR. That allows the brown butter to solidify in the dough. Which means less spread of the cookies. Also, it's hydrating the dough resulting in more flavor. My recommendation, if you do chill the dough for longer than an hour or two is to scoop after an hour then line on parchment paper, wrap in plastic wrap and store back into the fridge. Since the brown butter becomes a solid, it can be a bit tough to scoop it out after its been in the fridge overnight.
- Got chocolate? There's not such thing as too much chocolate! If you have leftover chunks or chips. I like to add another chunk onto my cookie dough right before baking. It makes the cookies look even more delicious with that ooey gooey chocolate.
- Timing: For my oven, I found baking these cookies at 11 minutes resulted in a doughy center cooking. 12 minute was still a little doughy but still cooked. 13 minutes the cookies were fully cooked. 14 minutes and my cookies were a bit crispy.
Did you make this recipe? Let me know!