Celebrate Independence Day in style with our delightful 4th of July Cookie Cake, a patriotic treat with a festive design. Using our classic chewy chocolate chip cookie cake base, adorned with vibrant red, white and blue American buttercream. I'm showing you two different designs that you can replicate at home to celebrate America's birthday.

This 4th of July Cookie Cake tastes as incredible as it looks! Making it a stunning centerpiece for your 4th of July celebration. Two festive designs you can make at home for your patriotic party, barbecues or family gatherings. These are a feast for your eyes and your stomaches.
If you're looking for more recipe ideas for 4th of July, check out my Chicken Club Pasta Salad, Tortellini Caprese Salad or Cabbage Pasta Salad.

Why You'll Love this Recipe
Super Delicious - Cookie cake is essentially a giant chocolate chip cookie. Its soft and chewy, loaded with lots of chocolate chips.
Two Different Decorating Designs - Two festive designs to choose from with step-by-steps photos to show you how to achieve this look.
Perfect for Sharing - Bring it to backyard barbecues, picnics and family get togethers. This 4th of July cookie cake is perfect for all of your summer parties celebrating America's birthday.
Ingredient Notes
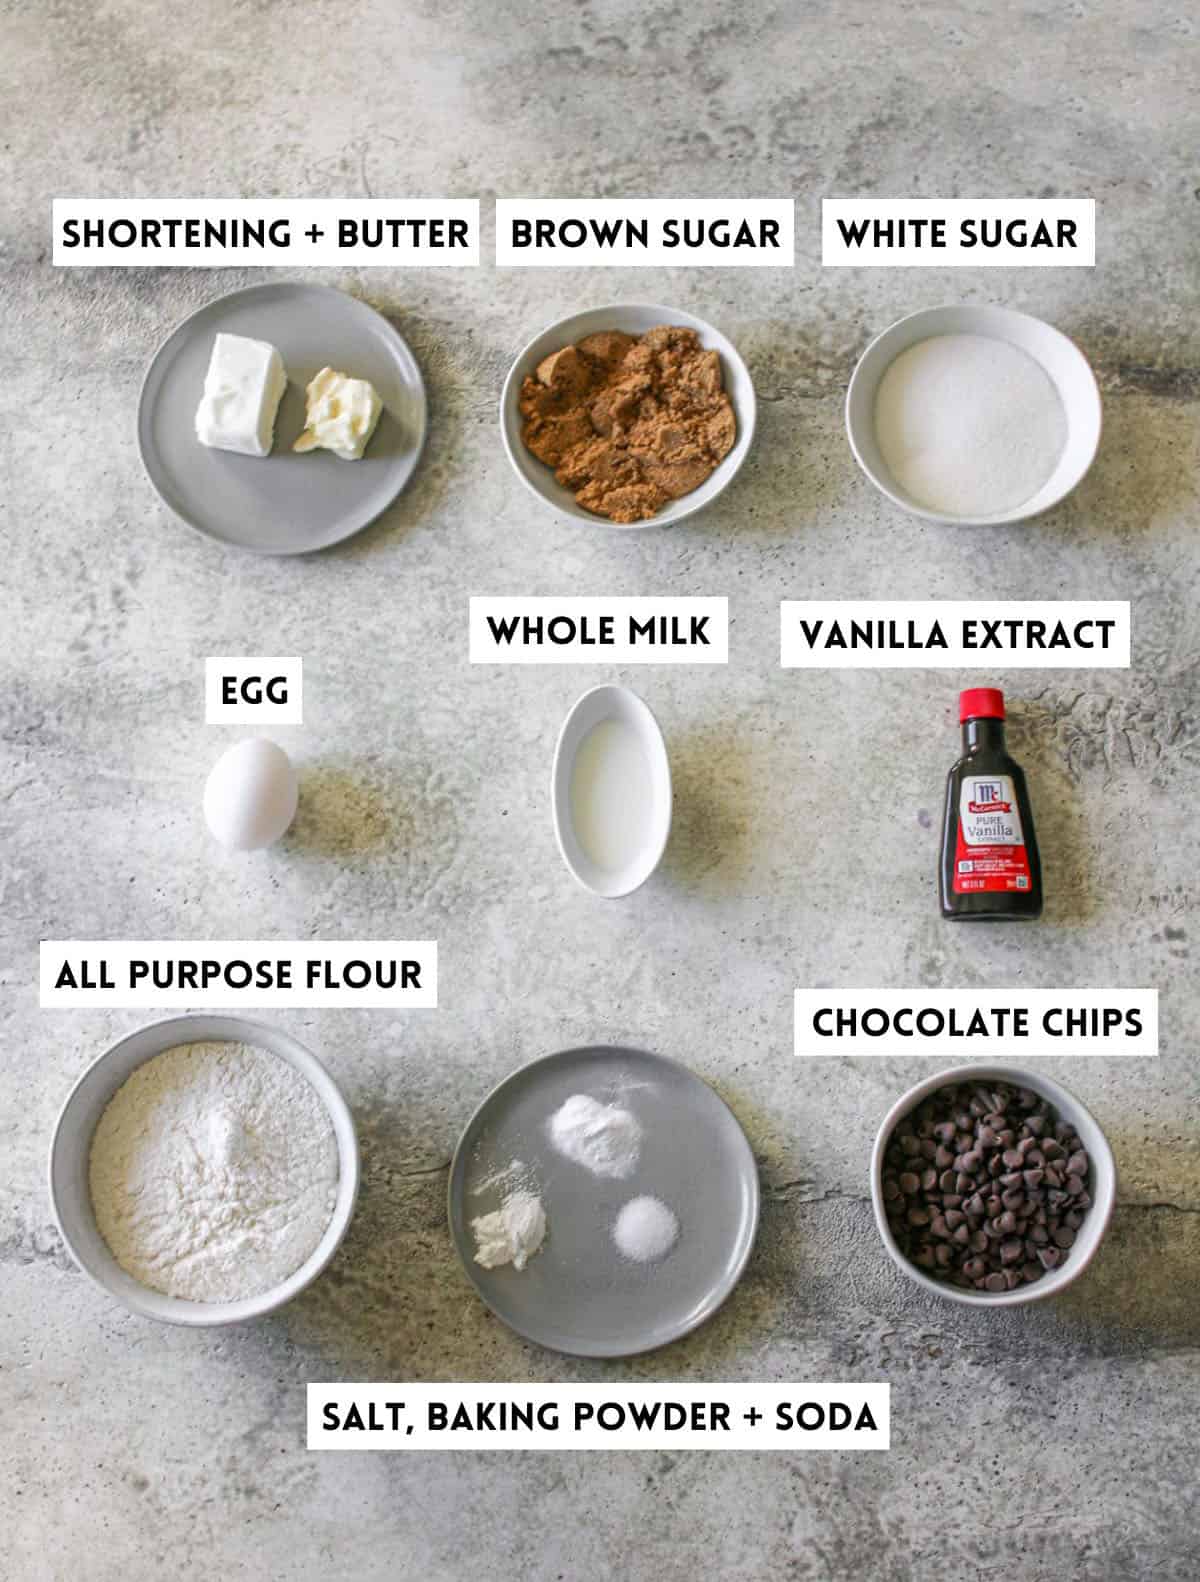
Shorting - room temperature, makes the cookie cake super tender and thick.
Unsalted Butter - room temperature, helps crisp up edges and gives the cookie cake a buttery taste. I use unsalted butter to control the salt levels in the recipe.
Granulated Sugar + Brown Sugar - to give our cookie cake that classic cookie taste. I like dark brown sugar for a more rich caramel flavor.
Egg - One egg for the richest, softest and chewiest cookie cake ever.
Vanilla Extract - for extra flavor. I recommend a pure vanilla extract for best flavor.
Baking Soda + Baking Powder - Leavening agents for an extra thick cookie cake.
Salt -A pinch of salt will keep your cookie cake moist and flavorful.
Milk - keeps the dough moist and adds color to cookie cake.
Chocolate Chips - I used normal sized semi-sweet chocolate chips but you could use milk or dark chocolate chips. Or, even chunks!
Frosting Ingredients + Decor Notes
Butter - I used unsalted butter. Should be room temperature!
Powdered Sugar - also known as confectioners sugar.
Vanilla Extract - extra flavor! Use real pure vanilla extract for best flavor.
Heavy Whipping Cream - helps create a light and fluffy whipped texture
Food Coloring - I recommend this Americolor Bundle of Gel Paste Colors. They are super saturated and only require a tiny amount to get great color.
Sprinkles - I used these Red White and Blue Star Sprinkles on the USA cookie cake for just a little extra pizzazz.
Equipment
Stand mixer or electric handmixer
Cake carrier with locking lid - I use to store cookie cake! It is quite large but the locking lid keeps it airtight!
Piping Bags
Piping Tips - For the Rosette Design, I used three Wilton 1M open star tips. For the USA Design, I once again used three Wilton 1M open star tips and then two round tips, one slightly larger (Wilton 2A) and one smaller (Ateco 12).
Step-by-Step Instructions
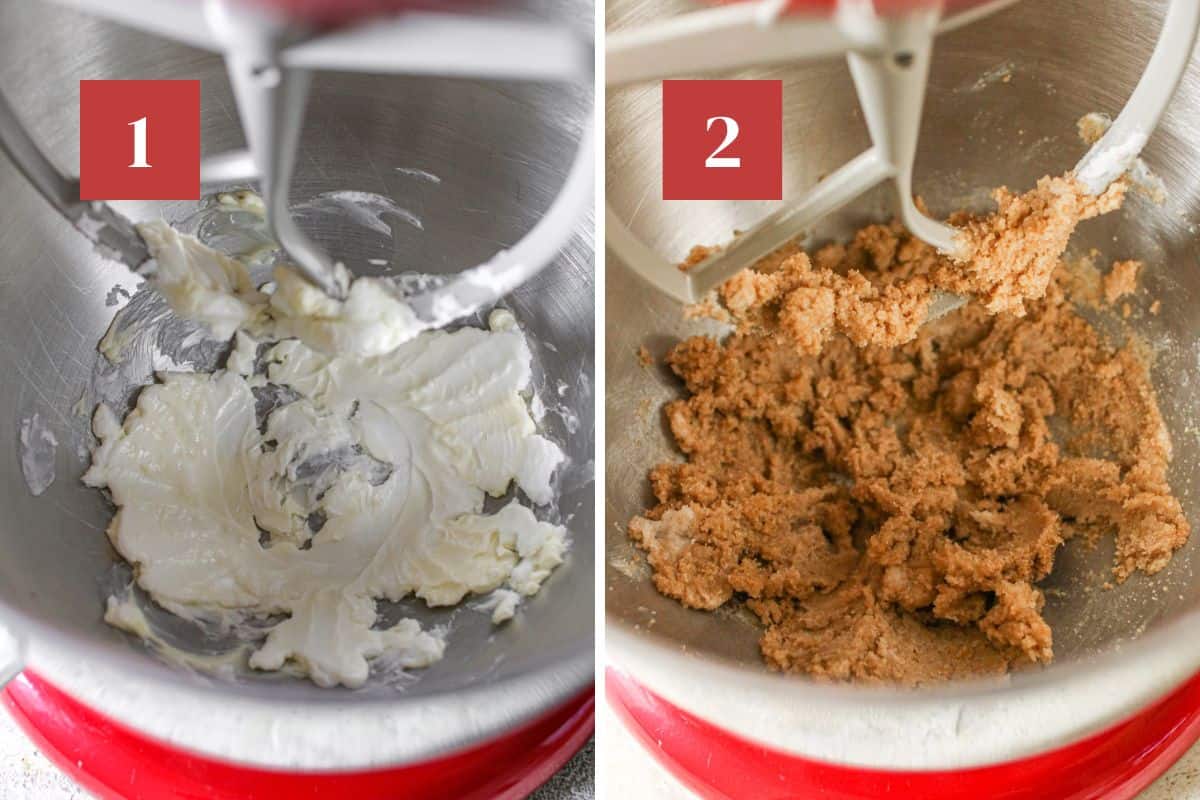
- Preheat the oven to 350°F. Butter or spray a 9-inch round springform pan and set aside. Start the base: Cream together butter and shortening together with a stand mixer for roughly 1 minute.
- Add in sugar and beat again for another 2-3 minutes. Scrap bowl the bowl as need.
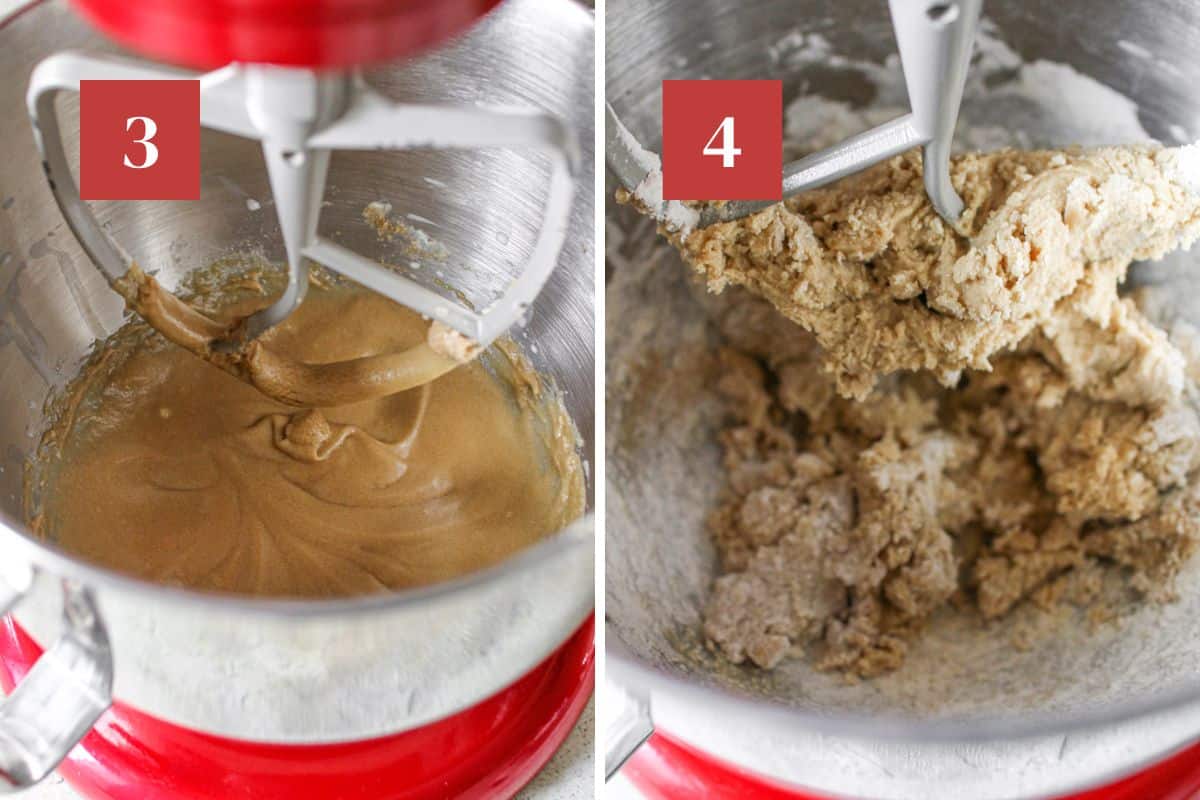
- Add in egg to the stand mixer. Beat it together until everything is combined for about 1-2 minutes. Scrap bowl the bowl as need. Then, add in vanilla and milk and beat again for another 1-2 minutes.
- Add in all the dry ingredients to the stand mixer and mix until just combined (it's okay if there's are a couple of streaks of flour).

- Set aside 2-3 tablespoons of chocolate chips and add the rest of the chocolate chips to the dough. Gently fold into the cookie cake dough with a wooden spoon or silicone spatula.
- Press the dough into the prepared 9-inch springform pan. Gently press extra chocolate chips onto the top. Bake for 20-25 minutes in the pre-heated oven, until the edges turn a golden brown. Cool: in the pan on a cooling rack until completely cooled. Carefully remove the cookie cake from a spring form pan.
Frosting Instructions

- Start by beating butter with a stand mixer fitted with a paddle attachment or a handheld mixer on medium speed for about 2 minutes until creamed.
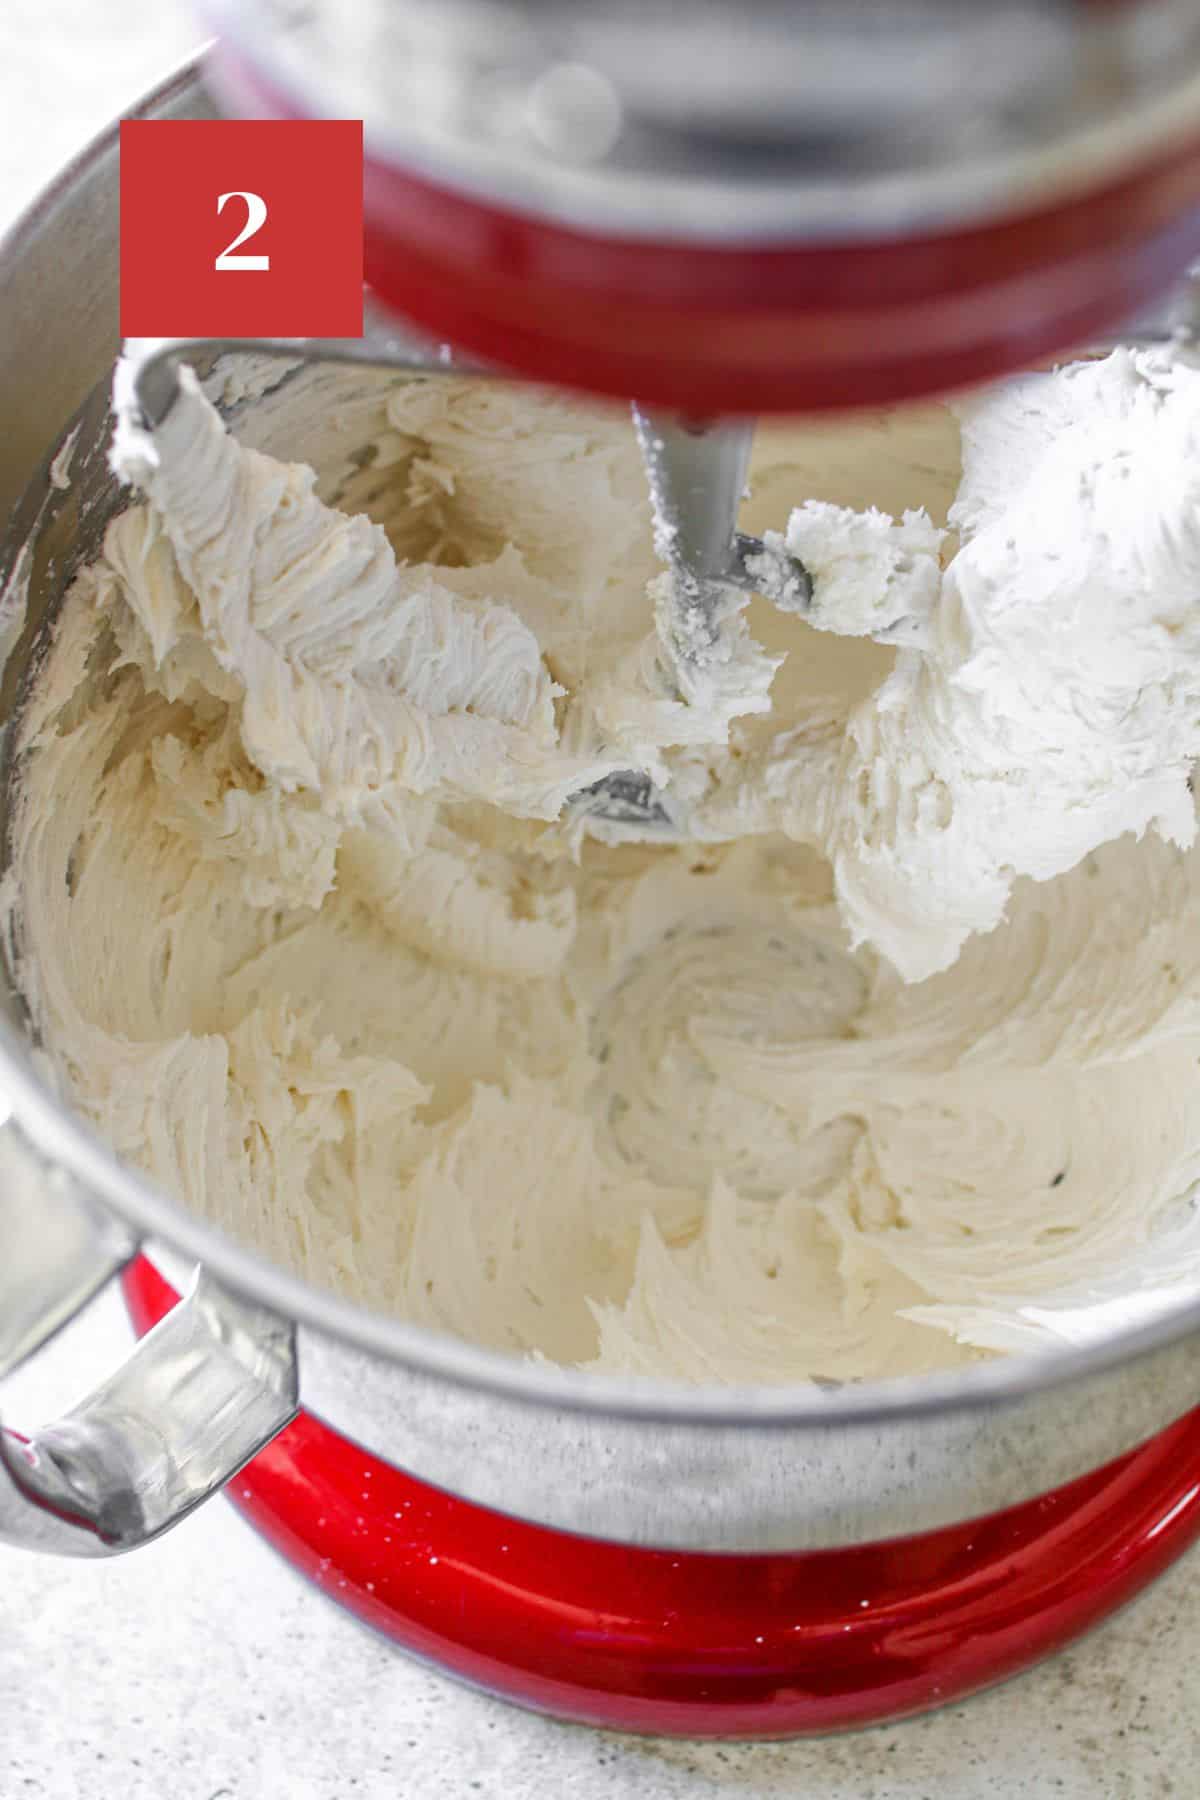
- Then, add in powdered sugar, vanilla extract and heavy cream. (Optionally add in a pinch of sea salt to balance out the sweetness of the frosting). Beat on low speed for about 30 seconds, increase to medium speed for 30 seconds and then increase to medium-high speed and beat for another 2 minutes.

- Divide and color frosting. I am estimating how much frosting I used. Since some of it depends on how big you make certain elements on your cookie cake, the size of your spring form pan, etc.
- For The Rosette Cake make ~ 1.5 cups of vanilla buttercream frosting. Divide evenly. Keeping one white, turn one red, and one blue. Divide into piping bags fitting with a Wilton 1M open star piping tip.
- For the USA Cake make ~ 1.875 cups of vanilla buttercream frosting. Divide into ⅔ cup - red, ⅔ cup - white and about ½ cup of blue. Divide into piping bags fitting with a Wilton 1M open star piping tip.
Decoration Instructions - Rosette Design

- Starting with the white buttercream, hold the bag straight up, with the tip just slightly above the surface. and held an inch or two away from the edge of the cake, squeeze to form a star. Without releasing pressure, raise the tip a little bit and move it slightly to the side. This will be the starting point of your rosette. Pipe a line of icing moving toward the top of the star. Using a circular motion, pipe a tight circle around to the starting point of your rosette and then pull away. Continue around the border alternating red and white rosettes until you're ⅔ to ¾ done with the border.
- Finish the border with blue buttercream rosettes.
Decorating Instructions - USA Design

- Hold a piping bag fitted with an wilton M1 star tip at a direct 90-degree angle from the cake. Squeeze and let the icing mound up a bit, then release the pressure and pull the piping bag straight up. It should form a nice point at the top. Alternate, red, white and blue buttercream until your border is complete.
- Use leftover red frosting and add to a new piping bag fitted with a round tip (the larger of your two). Carefully, pipe out the letters 'USA' making sure to keep it as centered as possible and all letters similar in size both width and length.

- Put leftover white buttercream in a new piping bag fitted with a smaller round piping tip. Pipe on top of the 'USA'.
- Sprinkle red, white and blue stars sporadically on the cookie cake.
Expert Tips
Cool it completely! - Make sure to let the cookie cake cool completely before you frost it. It takes about 90 minutes - 2 hours roughly for my cookie cake to completely cool. But you can make this cookie cake the night before serving, let it cool completely overnight, and frost it the next day.
Properly Measure Flour - If you just dip your measuring cup into a bag of flour, chances are you have way too much flour due to packing. I keep a small digital scale to accurately measure flour BUT you can also use the spoon and level method too if you don't have a scale. To do this, use a spoon to fluff up the flour within your flour bag or container. Then use a spoon to scoop the flour into the measuring cup and finally use the straight edge of a knife to level the flour across the measuring cup.
Room Temp Ingredients are Key - a room temperature egg and butter form an emulsion and traps air and blend/combine together very easily since they are warmer creating a seamless dough. Cold ingredients don't incorporate together easily and can result in dense puffy baked good and also seize up the dough.
Warning! Weird Taste From Cooking Spray - I found that olive oil cookie sprays, can sometimes create a bitter taste in the cookie cake. I recommend using original pam or a neutral cooking stray.
Frosting Tips! - Gel color can be incredibly concentrated. You only need just a little bit to get your desired color. Also, color develops after waiting some time so you can make and color the frosting as the cookie cake cools and that should be enough time to allow the colors to fully develop. Note, if you use TOO MUCH food coloring that can negatively effect the texture.
Practice Piping! - If you're worried about any elements, for example for the rosettes or writing 'USA'. Practice on a piece of clean parchment paper and re-scoop it into the piping bag. It will be a bit messy but it can help you get familiar with the movement.

Recipe FAQ
I like to use both shorting and butter in my cookie cake. Shortening is made up of 100% hydrogenated vegetable oil and contains no water while butter contains 80% butterfat and 20% water. Shortening traps more air bubbles and produces a soft interior texture along with holding its shape during baking.
Technically, yes you can use just one if you have it on hand BUT for best results I do recommend both shortening and butter.
You could use a pizza pan or a 9x13 pan in a pinch you will just need to adjust your baking time.
Storage
If your cookie cake is unfrosted, keep it in an airtight container at room temperature with a slice of bread for 2-3 days.
If your cookie cake is frosted and the frosting contains heavy cream, keep it in an airtight container in the fridge with a slice of bread for up to 2-3 days.
White bread is recommended as it has no additional flavor BUT I have done this with wheat bread, etc. in a pinch. It's a great way to use the heels of your bread. The cookie cake will absorb the moisture from the bread and keep it softer longer. If you feel the bread has become dry and hard after a day or so, replace it with a new piece of bread.
I use a cake carrier for storing my whole unsliced cookie cakes. They are quite large BUT the locking feature acts like an airtight seal.
You Might Also Like
PS If you try this recipe, why not leave a star rating in the recipe card right below and/or a review in the comments section further down the page? I always appreciate feedback. You can also follow me on Pinterest, Facebook or Instagram.

4th of July Cookie Cake
Ingredients
Cookie Cake
- ¼ cup shortening room temperature
- 2 tablespoons unsalted butter room temperature
- ⅜ cup dark brown sugar (6 tablespoons)
- ⅜ cup white granulated sugar (6 tablespoons)
- 1 large egg room temperature
- 1 tablespoon whole milk
- 1 tablespoon vanilla extract
- ¼ teaspoon salt
- ½ teaspoon baking powder
- ½ teaspoon baking soda
- 1 & ⅜ cups all purpose flour (165 grams)
- 1 cup semi-sweet chocolate chips set aside 2-3 tablespoons
Buttercream Measurements (for Rosettes Design)*
- 10 tablespoons unsalted butter room temperature
- 2 & ½ cups powdered sugar
- 1 tablespoon heavy whipping cream
- 1 & ⅛ teaspoons vanilla extract
- a pinch of sea salt optional
- Red and blue gel food coloring
Buttercream Measurements + Decorations (for USA Design)*
- 1.5 sticks unsalted butter room temperature (12 tablespoons)
- 3 cups powdered sugar
- 1 & ½ tablespoons heavy whipping cream
- 1 & ½ teaspoons vanilla extract
- a pinch of sea salt optional
- red and blue gel food coloring
- red, white and blue star sprinkles
Instructions
Cookie Cake
- Preheat the oven to 350°F. Butter or spray a 9-inch round springform pan and set aside. Start the base: Cream together butter and shortening together with a stand mixer for roughly 1 minute.
- Add in sugar and beat again for another 2-3 minutes. Scrap bowl the bowl as need.
- Add in egg to the stand mixer. Beat it together until everything is combined for about 1-2 minutes. Scrap bowl the bowl as need. Then, add in vanilla and milk and beat again for another 1-2 minutes.
- Add in all the dry ingredients to the stand mixer and mix until just combined (it's okay if there's are a couple of streaks of flour).
- Set aside 2-3 tablespoons of chocolate chips and add the rest of the chocolate chips to the dough. Gently fold into the cookie cake dough with a wooden spoon or silicone spatula.
- Press the dough into the prepared 9-inch springform pan. Gently press extra chocolate chips onto the top. Bake for 20-25 minutes in the pre-heated oven, until the edges turn a golden brown. Cool: in the pan on a cooling rack until completely cooled. Carefully remove the cookie cake from a spring form pan.
*Frosting Instructions*
- Start by beating butter with a stand mixer fitted with a paddle attachment or a handheld mixer on medium speed for about 2 minutes until creamed.
- Then, add in powdered sugar, vanilla extract and heavy cream. (Optionally add in a pinch of sea salt to balance out the sweetness of the frosting). Beat on low speed for about 30 seconds, increase to medium speed for 30 seconds and then increase to medium-high speed and beat for another 2 minutes.
- Divide and color frosting. I am estimating how much frosting I used. Since some of it depends on how big you make certain elements on your cookie cake, the size of your spring form pan, etc.For The Rosette Cake make ~ 1.5 cups of vanilla buttercream frosting. Divide evenly. Keeping one white, turn one red, and one blue. Divide into piping bags fitting with a Wilton 1M open star piping tip.For the USA Cake make ~ 1.875 cups of vanilla buttercream frosting. Divide into ⅔ cup - red, ⅔ cup - white and about ½ cup of blue. Divide into piping bags fitting with a Wilton 1M open star piping tip.
Decoration Instructions - Rosette Design
- Starting with the white buttercream, hold the bag straight up, with the tip just slightly above the surface. and held an inch or two away from the edge of the cake, squeeze to form a star. Without releasing pressure, raise the tip a little bit and move it slightly to the side. This will be the starting point of your rosette. Pipe a line of icing moving toward the top of the star. Using a circular motion, pipe a tight circle around to the starting point of your rosette and then pull away. Continue around the border alternating red and white rosettes until you're ⅔ to ¾ done with the border.
- Finish the border with blue buttercream rosettes.
Decorating Instructions - USA Design
- Hold a piping bag fitted with an wilton M1 star tip at a direct 90-degree angle from the cake. Squeeze and let the icing mound up a bit, then release the pressure and pull the piping bag straight up. It should form a nice point at the top. Alternate, red, white and blue buttercream until your border is complete.
- Use leftover red frosting and add to a new piping bag fitted with a round tip (the larger of your two). Carefully, pipe out the letters 'USA' making sure to keep it as centered as possible and all letters similar in size both width and length.
- Put leftover white buttercream in a new piping bag fitted with a smaller round piping tip. Pipe on top of the 'USA'.
- Sprinkle red, white and blue stars sporadically on the cookie cake.

Did you make this recipe? Let me know!